
The goal was to build a NAS that would accommodate four 3.5″ hard disks in a smallest footprint possible, could run full-blown OS (was considering Linux or Windows), produce minimum noise (passive cooling with max. one big-size low-RPM fan) and be energy efficient (disqualifying any standard 300-400W PC PSU). After the initial research I found an ideal motherboard Asus AT3IONT-I Deluxe – with passive cooler, four SATA ports and using 19V DC input power from an AC/DC adapter brick. The only problem it was not produced and sold in shops anymore. Luckily I was able to buy one on eBay – it was a sole board without all the accessories (I did not need the remote and stripped the WiFi module anyway). Just added a new power adapter and a RAM stick. Also had an HD44780 LCD from my old PC laying around so I added a small board to connect it to USB port (it was impossible to find a motherboard that would meet my previous requirements AND carry LPT port as well).
Hardware components
| Component | Description | Quantity | Price |
|---|---|---|---|
| Asus AT3IONT-I Deluxe | Motherboard, Intel® Atom 330, 4x SATAII, passive cooler | 1 | 65€ |
| Western Digital Caviar WD20EARX | 3.5" HDD, Western Digital Green 2TB SATA III, IntelliPower, 64MB cache | 2 | 169€ |
| Patriot PSD32G13332H | Memory 2GB DDR3 1333MHz CL9, w/ heatsink | 1 | 11€ |
| NOCTUA NF-S12B FLX | Case fan 120mm, 600/900/1200RPM | 1 | 18€ |
| Everbouquet MC2004E-SYL | Alphanumeric LCD Display with HD44780 controller, 20 x 4 chars, Yellow Green, backlit | 1 | 10€ |
| USB & serial LCD backpack | For connecting HD44780-compatible character LCD screens to USB port | 1 | 15€ |
| SanDisk Micro SDHC 8GB Ultra | MicroSD card, 8GB, Class 10 | 1 | 8€ |
| SATA cables | SATAII data and power cables | 4 | 10€ |
| Power supply AC adapter | Power brick 240V AC/19V DC 90W | 1 | 12€ |
| Total | 318€ |
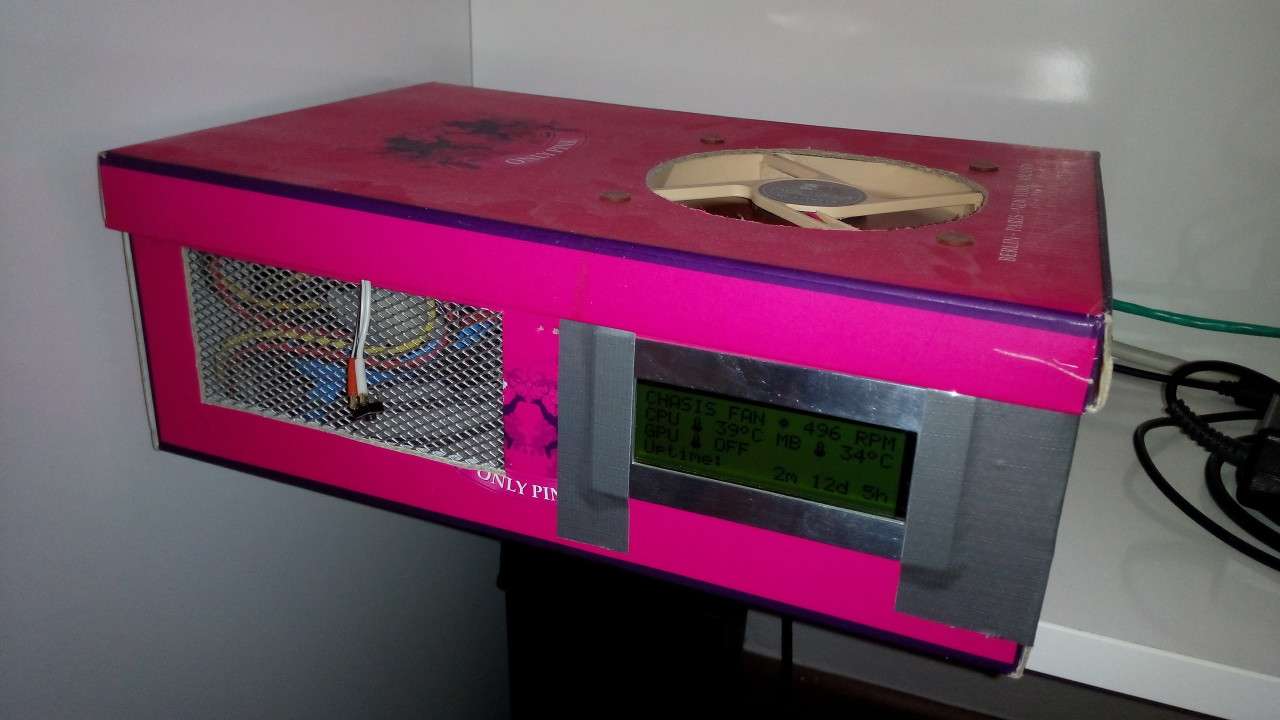
Initial hardware in a shoe box
Since I needed to setup the NAS asap and I knew I would not use any commercial case, I connected the components together and placed them in a shoe box. Added some intake grill and outtake hole for the fan, even taped the LCD in. Voila, a NAS!
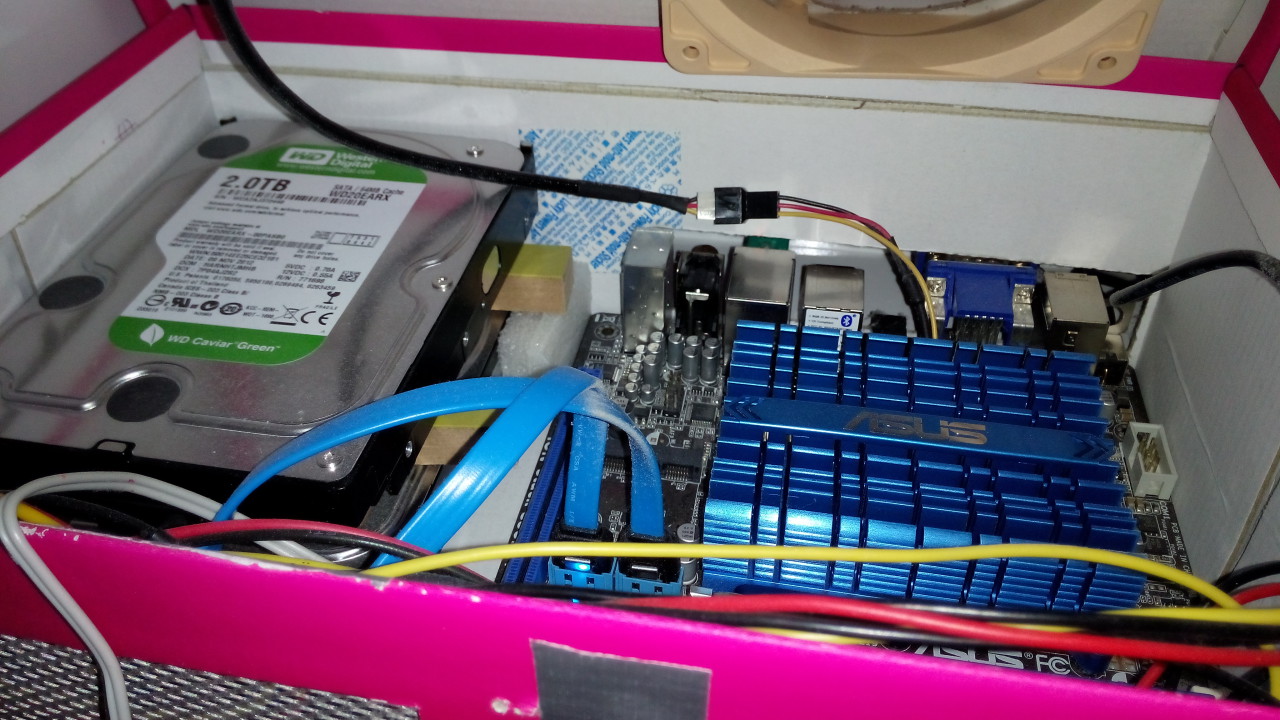
After adjustments in BIOS (disabling onboard Bluetooth, WiFi, Audio, lowering RAM voltage) and with all hard disks in idle state, the system is drawing only 18.5W from the wall socket. With two WD Greens spinning slightly over 22W.
I was running this setup for almost two years without problems but finally I decided it was time to address the visual aspect as well (and maybe avoid a risk of fire).
HDD cage
I started with HDD cage. The plan was to accommodate four 3.5″ HDDs (that’s the max. number of SATA ports on the mobo). Made it of 5x5mm brass bars and 6×2.5mm brass bands. The initial plan was to use bars for vertical columns (pic. 1), but it was not possible with a hand held saw to cut the bar ends orthogonal enough so I used bands as well (pic. 7-8). The cage ended up quite heavy which should help absorb vibrations from the spinning disks. To power up the disks I made a custom cable with female MOLEX connector which connects directly to motherboard.


Aluminum frame
For the frame I used aluminum 10x10mm L profiles and 10x10mm solid bars joined by 2.5mm metric thread screws. The frame is a rough cube with 20cm side.


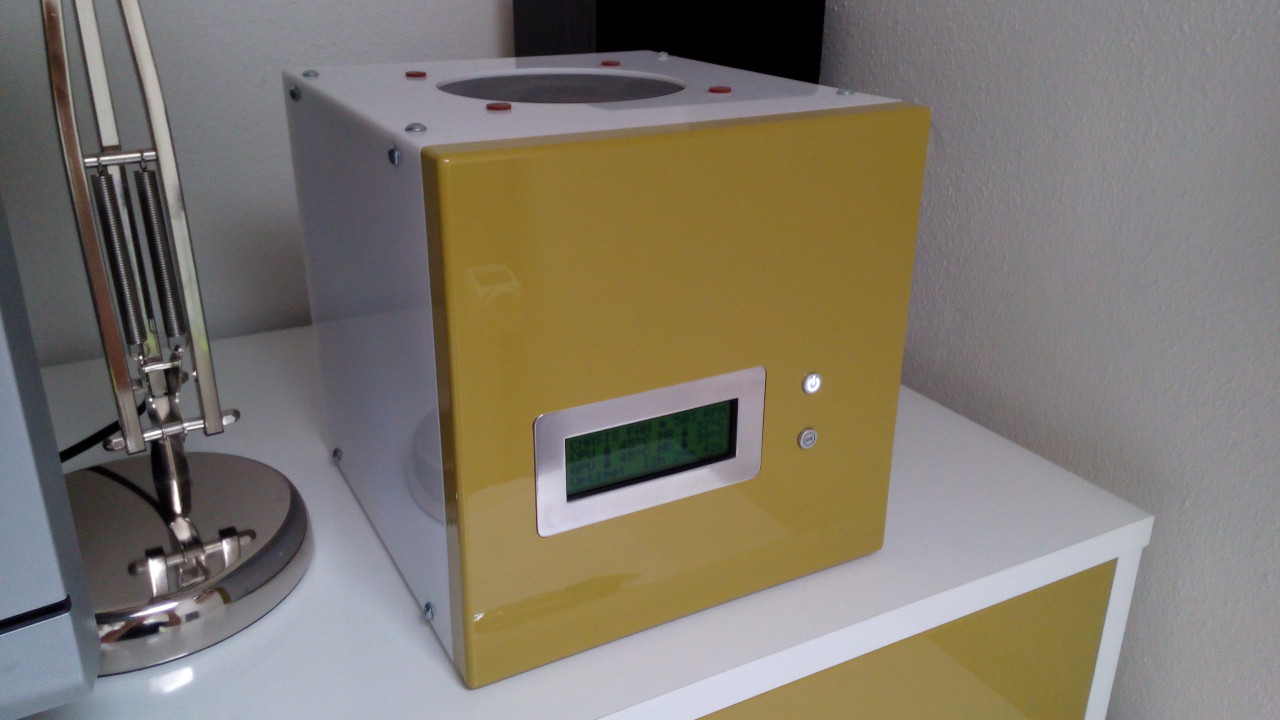
Front panel with LCD
For the front panel I’ve got 21x21cm foiled MDF board (the same as for the furniture doors and drawers). I used a router to cut the opening with groove for LCD display and aluminum bezel. Since I did not want to have the backlight on the LCD on all the time, I added a dedicated switch button for turning the backlight on/off besides power button. The backlight button was taller than power button, so I had to add another PCB acting as a riser. For the backlight button I used the cap from the same series as power button (modded it a bit).


Motherboard installation
For motherboard I added another two 10x10mm aluminum bars and screwed in the risers. The motherboard was installed in a position that would line up to the back panel with I/O openings.


HDD cage installation
To prevent the vibrations from spinning HDDs propagate to the case, I suspended the cage on four tension springs. According to my calculations the springs should be able to bear full load of four HDDs with enough clearance for the power and SATA connectors at the bottom.


Acrylate case
The panels are from 3mm white (opal) acrylic sheets cut by a laser cutter (from provided CoredDraw vector files). 100x better than cutting the holes by myself and well worth the price I paid. For the back plate I omitted holes for WLAN antenna, PS/2 keyboard, HDMI, and optical S/PDIF ports (I would also have covered RCA ports, audio jacks and Bluetooth adapter, but they stick out) as I don’t utilize those.


Components upgrade
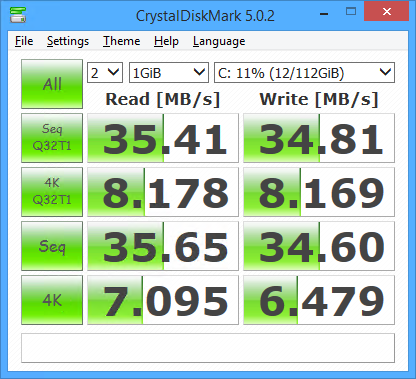
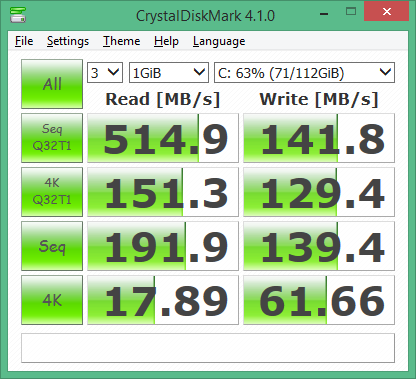
As I was finishing the build, I decided to add a second 2GB stick to upgrade the motherboard to maximum supported 4GB and install Windows 8.1. I could not find another identical Patriot 2GB stick so I sold the one I had and bought used 2x2GB Kingston HyperX (also with nice blue heatsinks). The upgrade to Win8.1 allowed me to replace the USB stick with Crucial SSD (as there is no TRIM support in WinXP) I had laying around after an upgrade in my HTPC build. Since I wanted to preserve the SATA ports for storage HDDs, I connected the SSD via SATA-to-USB.


The speeds are lower than would be possible on SATA II, nevertheless leaps better than with previous microSD card USB stick (the 4k makes the difference). Here are the screenshots from CrystalDiskMark. The last screen is the result for Crucial SSD connected to SATA III port on my HTPC (just for comparison).

List of materials and additional hardware
| Material/component | Price |
|---|---|
| Alluminum profiles and screws | 21€ |
| Front panel | 3€ |
| SATA power cable | 7€ |
| Connectors, switches, PCB, etc. | 30€ |
| SSD Crucial M500 120GB | 60€ |
| AXAGON ADSA-1S SLIMport SATA-to-USB | 7.50€ |
| Kingston 2x2GB DDR3 KHX1600C8D3K2/4GX | 18€ |
| Total | 146.50€ |
Showcase
A few final images to show-off the finished build.


Way to go bro!
Hey Great work
Which NAS OS running? how do you get the information from the system and displayed on the LCD?
Thank you
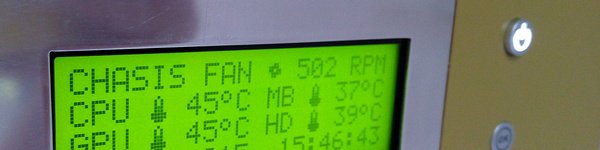
Hi, it’s running Win8.1 with LCD Backpack driver (USB => COM) and I am using LCD Smartie to display all the environmental stats from the system (fan speeds are read through a plugin from SpeedFan, all the others are directly from LCD Smartie).