
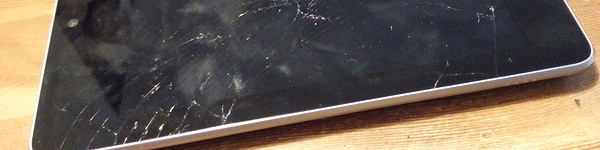
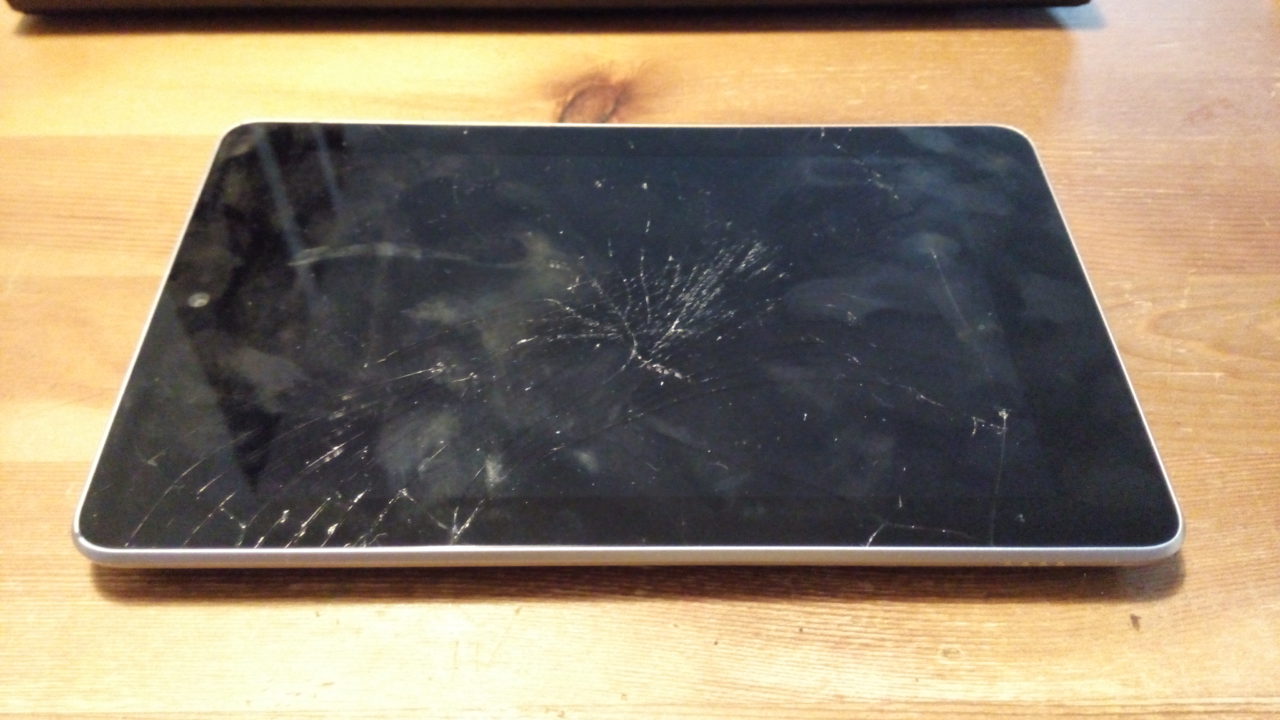
I’ve had my Google Nexus 7 2012 (32GB Cellular 3G version) for almost three years and during that time I abused it in every possible way without any consequences. I nearly thought that the unit is indestructible until one anecdote later (I won’t bore you with) after which the tablet ended up with a broken digitizer (it’s the top hardened glass responsible for touch input).
I checked several repair shops near by and the price for screen replacement was over 80€, which was pricier as buying a second-hand Nexus. Therefore I decided to buy a new touch digitizer and replace it myself. The digitizer (the sheer glass with a ribbon cable) can be obtained from eBay for as little as 10€ but as I found out from a youtube video, separating the glass from the LCD and then gluing the new glass back onto the LCD is a real pain in the ass and designated only for the hardcode-mac-gyver DIY doers.
Therefore I decided to settle for a complete digitizer+LCD+plastic bezel combo, which can be bought for some 30-35€. However, as I inspected the photos of the frame on eBay, I found out, that all those frames were not for my model ME370TG (they had screw holes in different positions and were missing NFC contacts). I had to buy LCD+digitizer and carefully remove the broken glass without breaking the bezel.
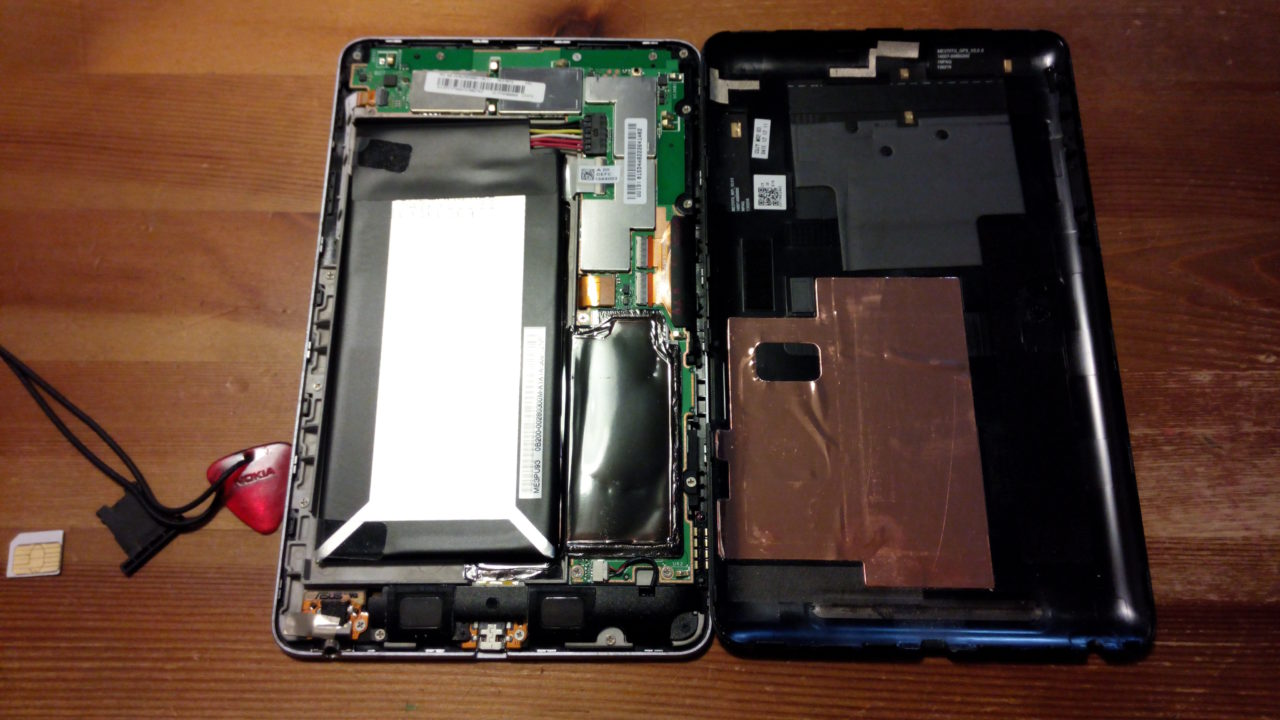
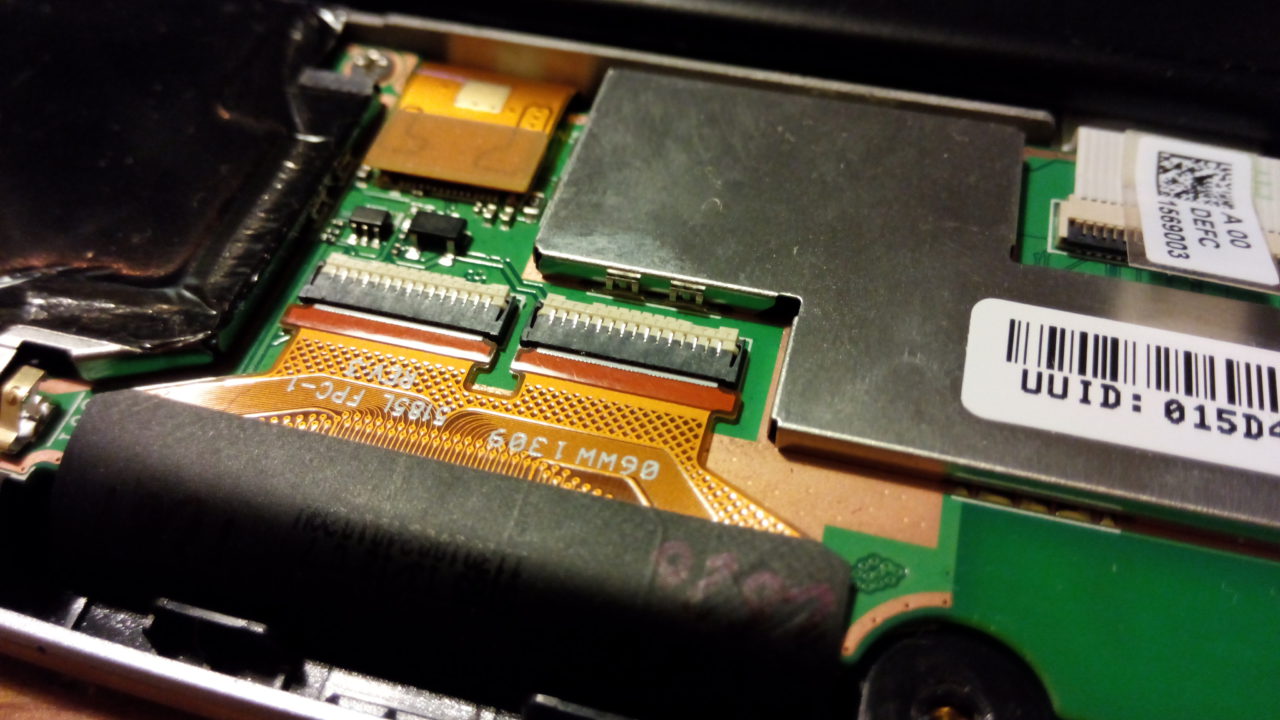
First I opened the back cover with a help of a guitar pick and finger nails. It goes pretty easy once you open a gap. I suggest you start at the bottom near the USB socket. Then you have to remove 14 screws and disconnect the ribbon cables. The position of 12 silver screws is marked with a red circle and 2 black screws (they are a bit longer) with blue one. There is one ribbon cable from screen digitizer with double connectors (disconnect by opening the black clips up which releases the ribbons) and second coming from LCD screen you need to pull and pry up. After that you should be able to separate the motherboard with battery from the bezel with the screen.


Now comes the fun part – removing the shattered glass from the bezel. I’ve found various techniques for removing the glass in one piece with a heat gun or a hair dryer but unfortunately my glass was broken into so many little pieces and the glue used to bond the glass to the bezel is probably the stickiest stuff besides what they use at NASA for repairing rockets, I had to break out the glass piece by piece (after a few first pieces I did not bother with heating up the glass again as it made little to no difference). After the glass was removed, I used an adhesive remover to get rid of the remaining glue on the bezel.


The original LCD is labeled as HYDIS HV070WX2 and the new LCD screen I ordered from China (about 25€) was labeled as CHUNGHWA LAA070WP03. However, both bottom labels started as H070WP031122… and they look identical, so it’s just a matter of different manufacturers supplying the same screen, I guess. I used double-sided tape on the back of the glass to attach the screen to the bezel and assembled everything back together (the short ribbon cable connecting LCD to the motherboard is not supplied with the new screen so you have to make sure not to damage the original cable during disassembly, as you have to reuse it).


Once everything was back in place, I connected the charger, and kept fingers crossed that the tablet would start.
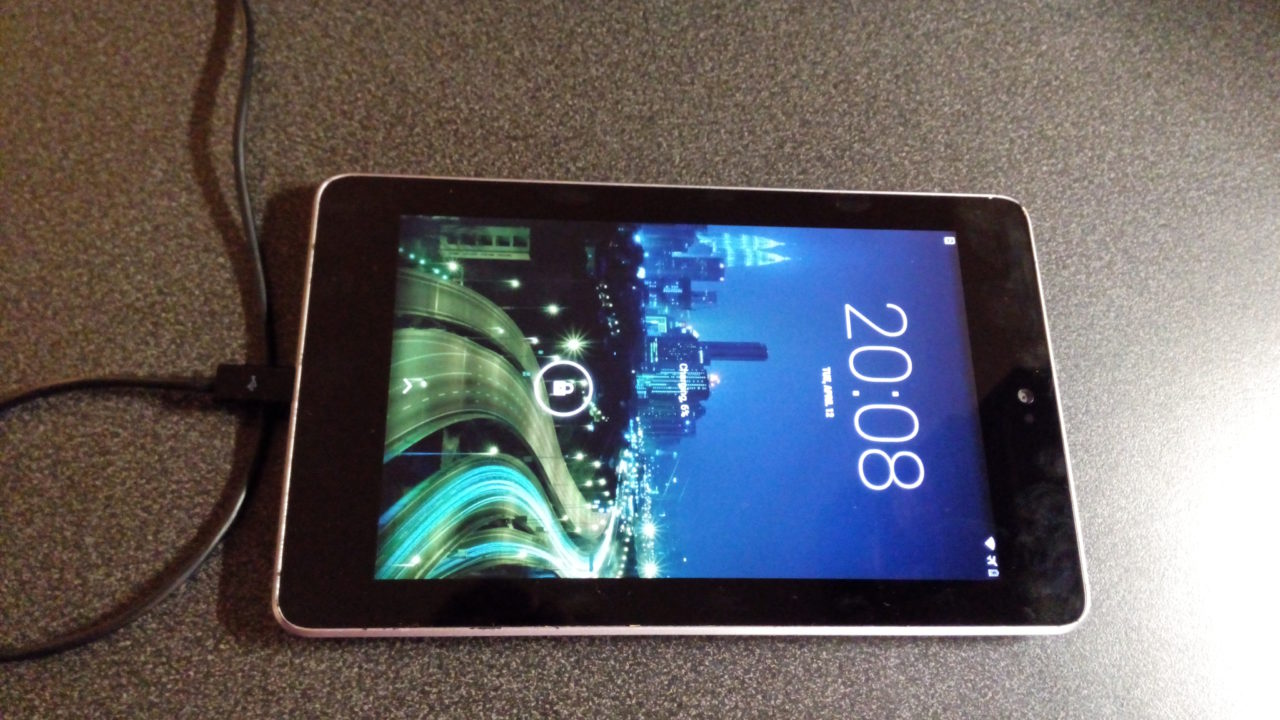
A little hint: if the screen does not light up after connecting the charger for the first time, do not panic. If the tablet was left powered off for a long period of time before the repair (like when you have to wait 3-4 weeks for the screen to arrive from China), the battery is so discharged, that it first needs some 5-10 minutes of charging before the tablet will be able to power up the screen and display battery charging animation.
UPDATE 25/06/16: I managed to drop the tablet and break the screen for the second time. 🙂 I ordered the same screen from the same eBay seller, but this time I got HYDIS HV070WX2 screen – the same as the original. Nevertheless, from what I can tell, the picture quality is identical on both CHUNGHWA and HYDIS screen.


can hairdryer be used? i dont have heat gun
Yes, a hair dryer will work.